15 Creative Craft Ideas for Teens Using Paper, Cardboard, and Paint


Teens are tough to craft for. Anything too simple feels babyish, and anything too fussy sits half finished on the desk for a month.
The sweet spot is a project that looks good enough to keep, uses supplies already in the house, and still leaves room for personal style.
Every idea on this list lands in that spot. Some take twenty minutes with scrap paper and glue. Others, like a cardboard cassette player or a rustic blossom shelf, can fill a whole rainy weekend.
Nothing here needs special skills, just patience and a willingness to get paint on your fingers.
Expect glowing lanterns, bold wall art, gifts friends will actually use, and a few projects that sharpen drawing and painting skills along the way.
Most need nothing fancier than markers, tissue paper, acrylic paint, or an old shipping box.
These 15 craft ideas for teens are made for skimming. Pick the one that matches your mood, clear off a table, and get your hands messy.
1. Blue and White Vase Collage with Tissue Paper Blossoms
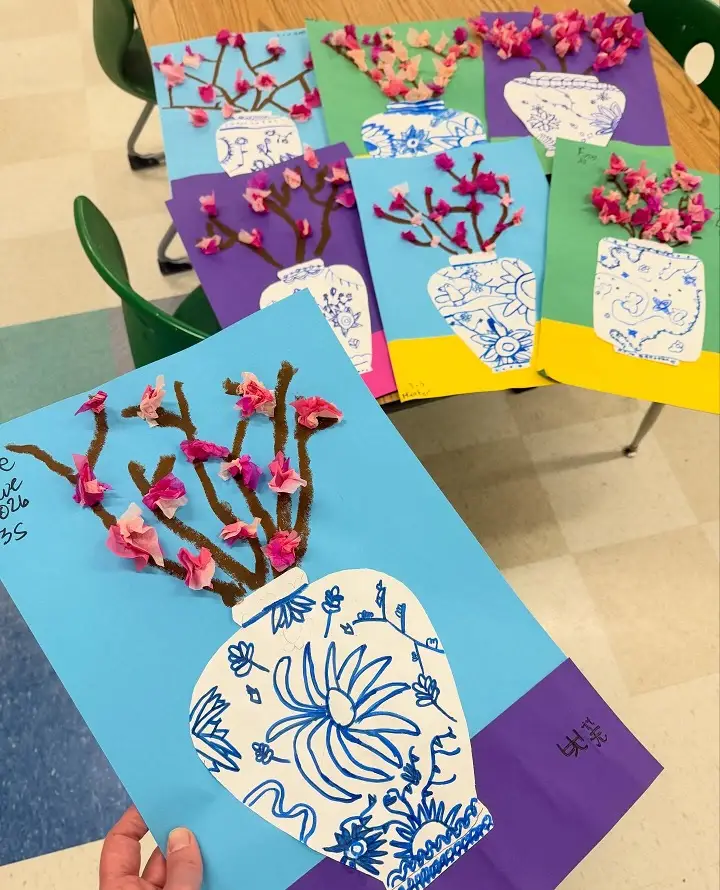
Cherry blossoms burst out of a painted china jar in this bright paper collage. The vase is cut from white paper and covered in blue marker flowers, swirls, and tiny sprigs.
Brown branches reach upward, and scrunched pink tissue makes each bloom stand off the page.
Start with a sheet of colored construction paper for the wall and a strip in a second color along the bottom for the tabletop. Sketch a jar shape on white cardstock, cut it out, and fill it with patterns using one blue marker.
Twist small squares of pink tissue around a pencil tip, dab on glue, and press them along branches you paint or draw in brown.
Sticking to a single ink color is what makes the vase look like real porcelain, so skip the rainbow. Teens who love detail can spend an hour on the patterns, while quick crafters can keep them simple.
A whole row of these looks like a mini gallery wall, which makes it a fun pick for a craft night with friends.
2. Cartoon Cardboard Cassette Player and Headphones

Cardboard has never looked this fun. Here, an empty box becomes a bright red tape player, a smaller box turns into a blue cassette, and rolled cardboard forms a pair of pink headphones.
Bold black outlines and quick white scratch marks give every piece a comic book style.
Grab a shoebox for the player and a slim snack box for the tape. Build the ear cups from cardboard circles and strips, and use a thin black paper strip for the cord.
Once everything is painted and dry, trace the edges with a black paint pen and add short white lines for shine.
Those thick outlines hide wobbly cuts, so even rough shapes end up looking sharp.
Pick any retro object you like, such as an old camera or a boom box. Plan on a full weekend for this one, since the paint needs time between layers.
3. Torn Paper Ocean Collage with Layered Waves
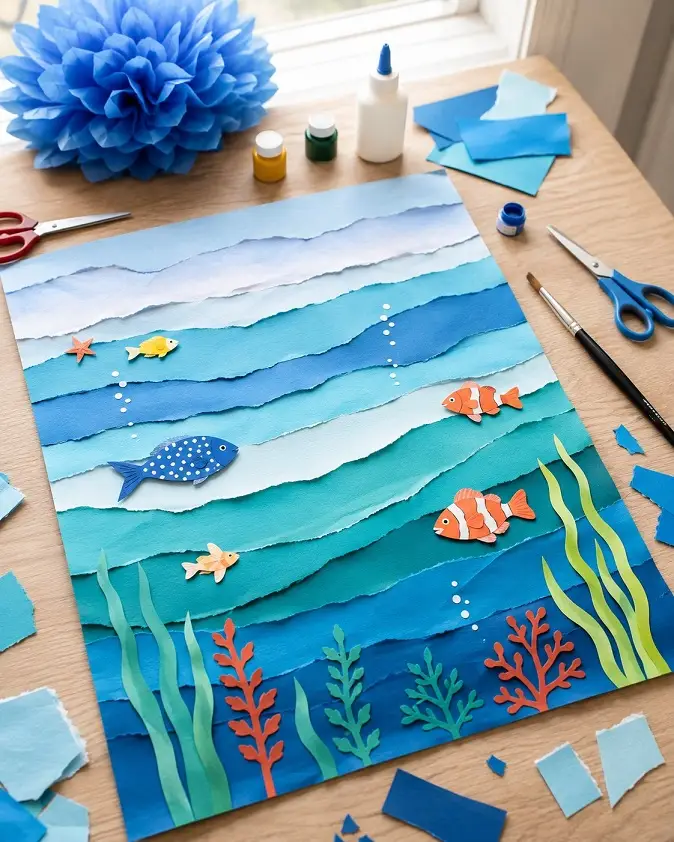
With nothing but ripped strips of paper, a calm blue sea fills the whole page. Pale shades sit at the top while teal and navy sink toward the bottom, so the water feels deep.
Little orange clownfish, a spotted blue fish, and a tiny starfish swim between the layers.
Collect scraps in five or six shades of blue and green, then tear each one into a long wavy strip. Glue them down from top to bottom, letting every new layer overlap the last.
Cut seaweed from light green paper and coral from red and dark green, then dot on white paint for bubbles.
Tearing by hand matters here, because the soft white edges look like foam on the waves. Scissors would leave the scene flat.
Scrap paper and a bottle of glue cover almost everything, which keeps this craft cheap and easy to start tonight.
4. Twig Sunset Art in a Shadow Box Frame
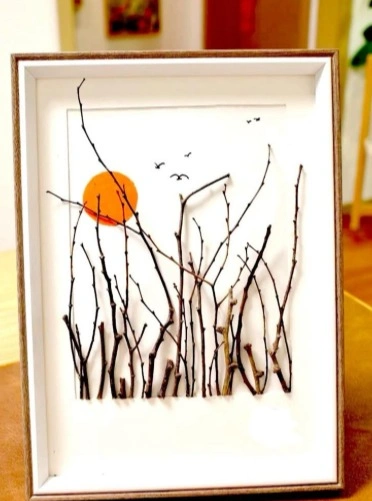
Ever noticed how bare twigs look like a pencil sketch on their own? In this framed piece, thin brown sticks stand upright like tall grass against a plain white background.
An orange paper circle plays the setting sun, and a few tiny black birds drift across the sky.
Go on a short walk and gather dry twigs of different heights. Snip them to fit a deep picture frame, and glue the orange circle onto white cardstock before anything else.
Hot glue holds the twigs best, so work slowly and keep fingers away from the thin tips.
Overlapping the sun with a few branches gives the scene real depth. Draw the birds as simple curved lines with a fine black pen. Less really is more here.
5. Paper Tree Wall Hoop with a Hanging Birdhouse
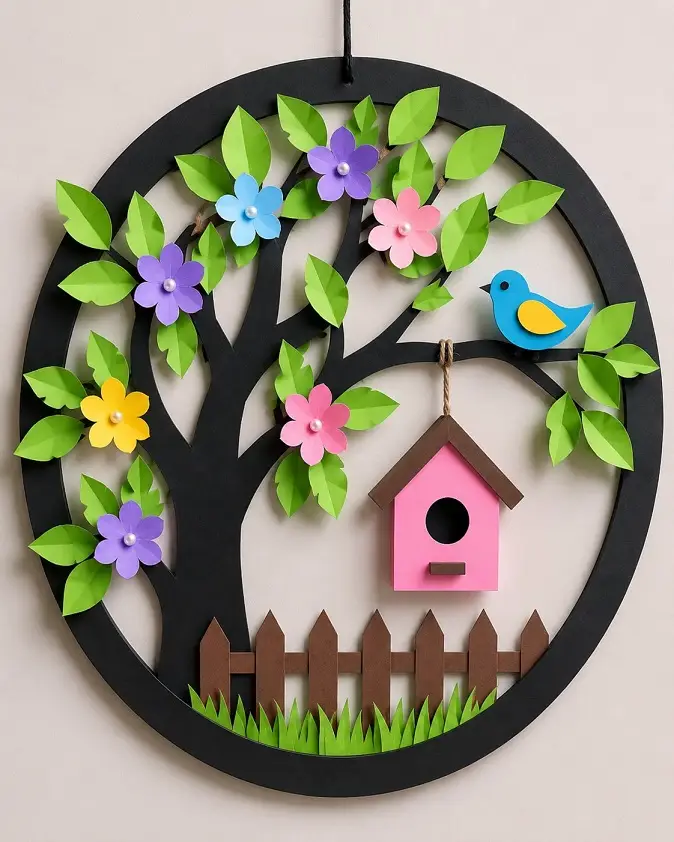
Round, bright, and packed with little details, this wall hanging fits a whole garden inside one circle. Inside a black ring, a tree silhouette spreads its branches, covered in green leaves and pastel paper flowers.
Below, a pink birdhouse dangles from twine, a blue bird perches on a limb, and a brown picket fence sits in fringed grass.
Trace the ring and tree as one connected shape on black cardstock or foam board, then cut it out with a craft knife and an adult nearby.
Fold each leaf down the middle so it lifts off the surface. Finish every flower with a small pearl bead in the center for a bit of shine.
Keeping the tree plain black lets the bright colors stand out. Swap the flowers for orange leaves in fall or paper snowflakes in winter.
Hung on a bedroom door, it becomes a sweet welcome sign that changes with the seasons.
6. Starry Night Paper Plates Inspired by Van Gogh
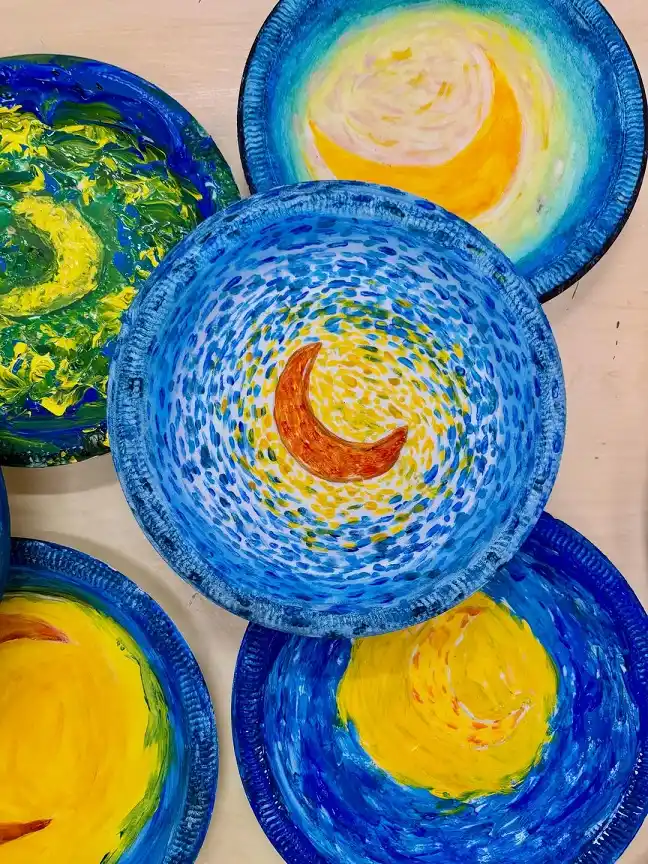
Van Gogh fans, this one is for you. Each paper plate becomes a tiny night sky, with swirling blues wrapped around a glowing yellow moon.
One version uses rows of small dabbed dots, while others lean on thick, curling strokes in blue, yellow, and green.
Paint the moon first in yellow and orange, right in the center of a plain paper plate or bowl.
Next, surround it with short dashes and dots that circle outward, shifting from yellow to light blue to deep blue near the rim. Acrylic paint works well here because it stays thick and shows every brushstroke.
Rather than blending the colors smooth, leave each mark visible, since that texture makes the swirl feel alive.
Try a cotton swab for neat round dots if a brush feels hard to control. Hang a few side by side on the wall and they read as one big sky.
7. Painted Terracotta Pots with Simple Flower Patterns

Bright rims and simple flowers turn plain clay pots into cheerful little planters.
Daisies with yellow centers dot a sky blue pot, red tulips line up on a white one, and white blooms stand out against hot pink. Every rim gets its own bold color, which ties each design together.
Wipe the pots clean and give the outside a base coat of acrylic paint, leaving the inside bare. Color the rim in a contrasting shade once the first coat dries.
For flower centers, dip the back of a brush handle in paint and stamp a round dot, then add petals and stems with a thin brush.
Sealing the outside with clear spray varnish helps the paint survive watering.
Pot up small succulents or herbs, and each one becomes a thoughtful gift. Let the paint dry overnight before any soil goes in.
8. Tie Dye Paper Circles Hanging from a Branch
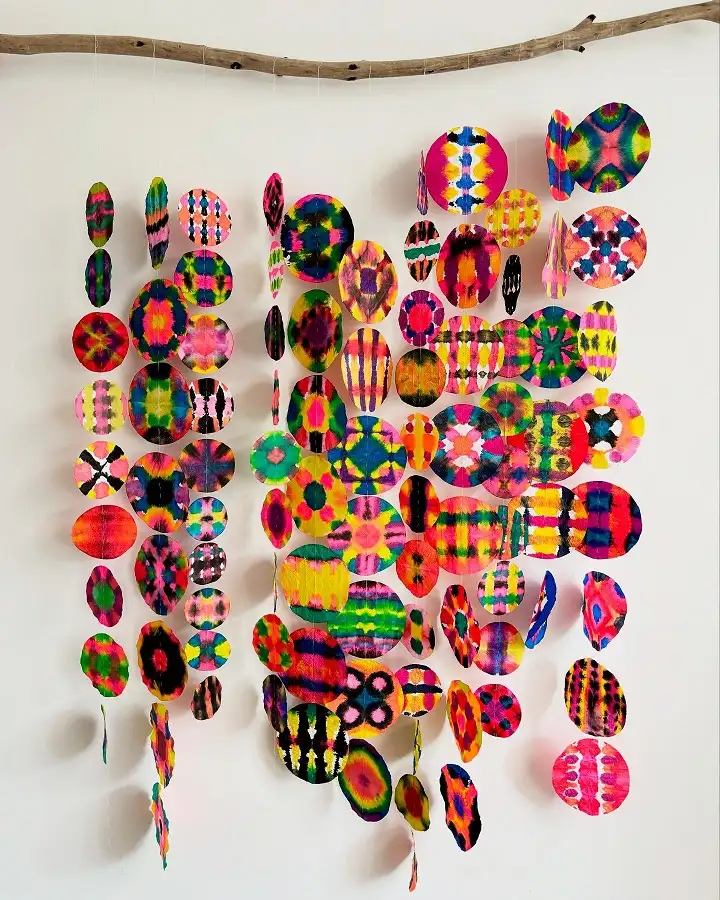
Dip, unfold, and watch the colors bloom. Dozens of paper circles in neon pink, yellow, green, and blue hang in long strands from a bare branch.
Folding the paper before dyeing creates the mirrored patterns, so every circle looks like a little kaleidoscope.
Thin, absorbent paper such as coffee filters or rice paper soaks up color best.
Accordion fold a sheet into a small square or triangle, then dip each corner into liquid watercolor or food coloring and let the dye spread. Open it up, dry it flat, and cut circles to glue onto clear thread.
Varying the circle sizes keeps the strands from looking stiff. Gloves and a covered table are smart, since neon dye stains fingers fast.
Near a sunny window, the thin paper glows like stained glass.
9. Still Life Pear Study in Pencil and Pastel
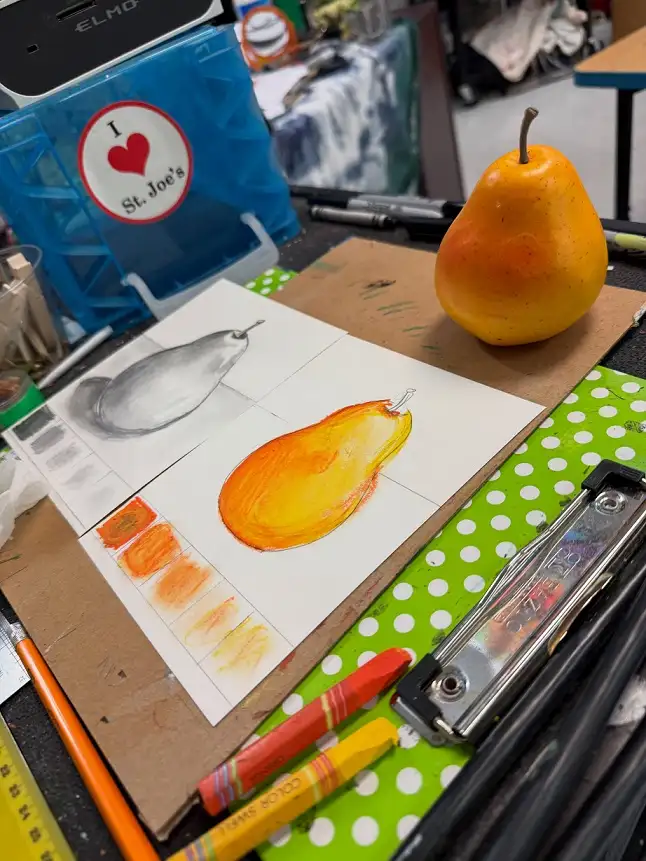
Drawing one pear sounds easy, until you try to make it look round. This study tackles it twice on a single sheet, first in soft graphite and then in warm orange and yellow.
Beside each drawing sits a strip of swatches running from dark to light, known as a value scale.
Set a real piece of fruit next to your paper so you can see where the light hits. Divide the sheet into sections, and fill one narrow strip with five boxes that go from your darkest shade to almost white.
Use those boxes as a guide while shading, pressing hard in the shadows and lightly near the shine.
Practicing the value scale first trains your hand before the real drawing starts. Oil pastels or crayons blend nicely when you layer yellow under orange.
Any fruit works, so grab an apple or a lemon from the kitchen and keep going.
10. Tissue Paper Lanterns with Beaded Handles
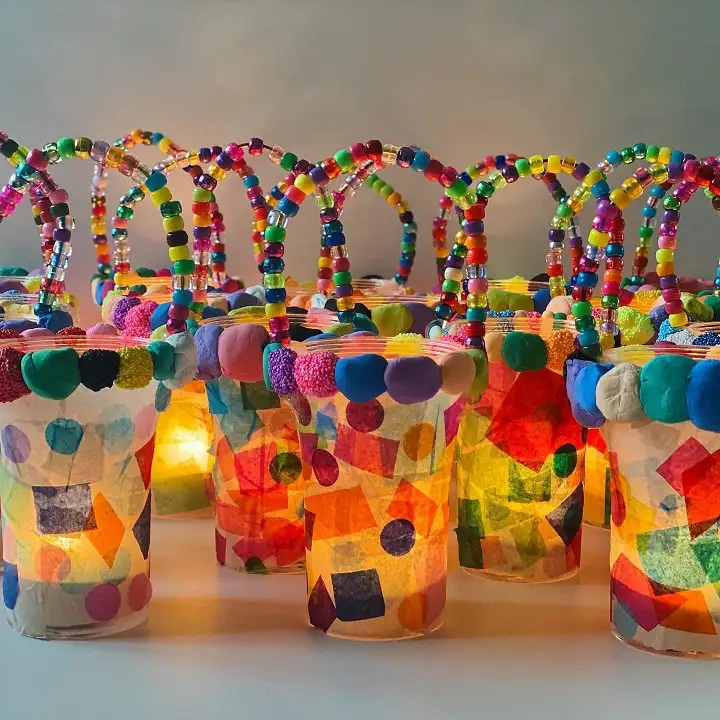
Soft light glows through layers of tissue paper in these cheerful lanterns. Squares and circles in red, orange, yellow, blue, and purple overlap all around each one.
Chunky clay balls ring the top edge, and a pipe cleaner handle strung with pony beads arches over it.
Clear plastic cups make a sturdy, lightweight base. Brush on watered down school glue, press on tissue shapes, and add one more glue layer over the top to seal them.
Thread beads onto a pipe cleaner, bend it into an arch, and push the ends through small holes poked near the rim.
Layering the tissue creates brand new colors where the pieces meet. Battery tea lights are the safe choice inside, since real flames and paper do not mix. Line a few along a shelf and your room gets a cozy glow at night.
11. Birch Forest Ink Painting with One Autumn Leaf
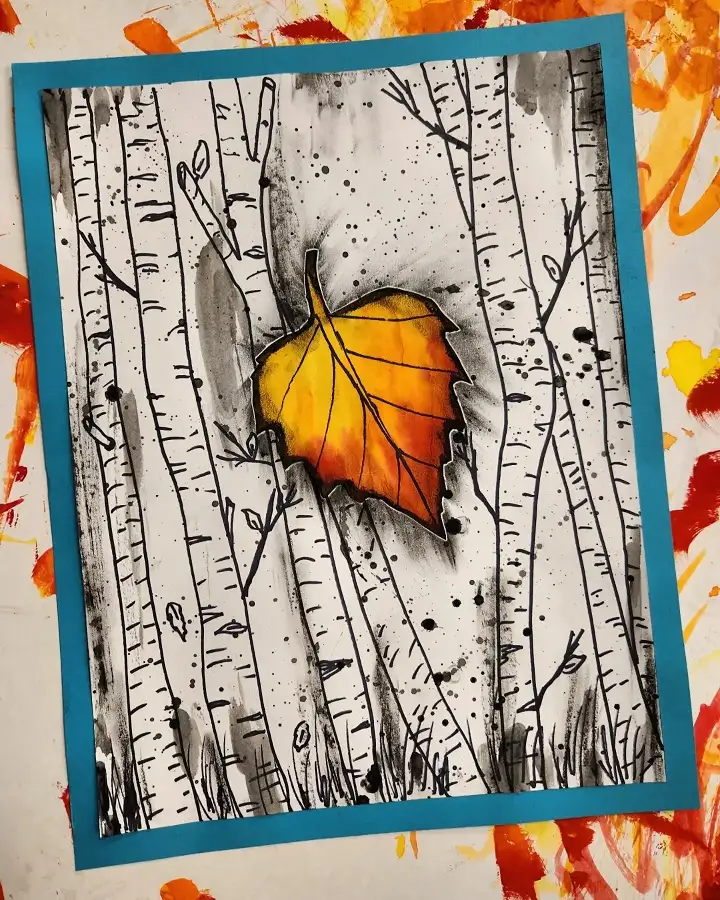
Black and white birch trunks fill this whole page, and right in the middle floats one fiery orange leaf.
Gray washes and tiny ink splatters fill the gaps between the trees. Against all that quiet, the warm leaf grabs your eye in a second.
Outline tall, uneven trunks with a black marker, adding short curved lines for bark and a few thin twigs. Watered down black paint brushed between them adds shadow, and a flick of a loaded brush makes the speckles.
On a separate scrap, blend yellow into orange and red for the leaf, then cut it out and glue it in the center.
Limiting the trees to black and gray lets one color do all the talking. Uneven spacing between trunks looks more natural than neat rows. Mount the finished piece on teal paper, and it is ready to hang.
12. Rustic Wood Frame Shelf with a Blossom Branch
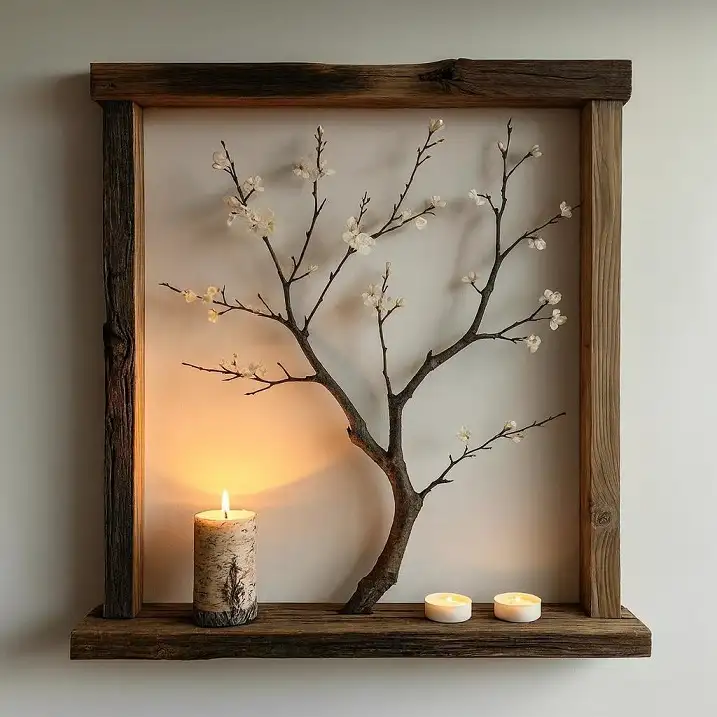
Who says wall decor has to come from a store? Tucked into a weathered wood frame, a real branch dotted with tiny white blossoms leans against a pale backdrop.
Resting on the shelf at the bottom, a birch bark candle and two tea lights cast a warm glow up the wall.
Old fence boards or scrap lumber work well for the frame, and an adult can help with the sawing. Cover the back panel in soft white so the branch stands out.
Find a fallen branch with a nice curve, glue small paper or faux flowers along it, and fix the base to the shelf.
No saw at home? Remove the glass from a deep secondhand frame and add a thin strip of wood along the bottom instead. LED candles are the safer pick, since a real flame would sit right under a dry branch.
13. Pop Art Name Designs with Patterned Backgrounds
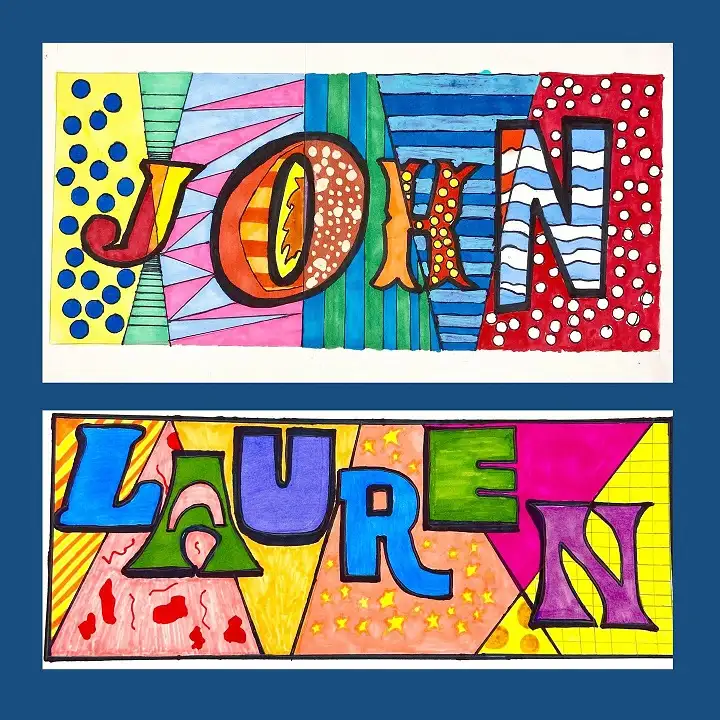
Your own name might be the easiest art subject out there. Big bubble letters sit on a background split into sharp triangles and stripes, and every section gets a different pattern.
Polka dots, waves, stars, and grids all share one page, yet thick black outlines hold everything together.
Write your name across a long strip of paper in tall, chunky letters, letting a few touch the edges.
Rule lines from corner to corner with a ruler to break the space behind them into odd shapes. Fill each shape with its own color and pattern, then trace every edge with a thick black marker.
Giving the letters solid colors while the background stays busy helps them stand out.
Markers are the easiest tool, though colored pencils work too. Frame it, and it becomes a gift any friend would keep.
14. Painted Lavender Mason Jar with Fairy Lights
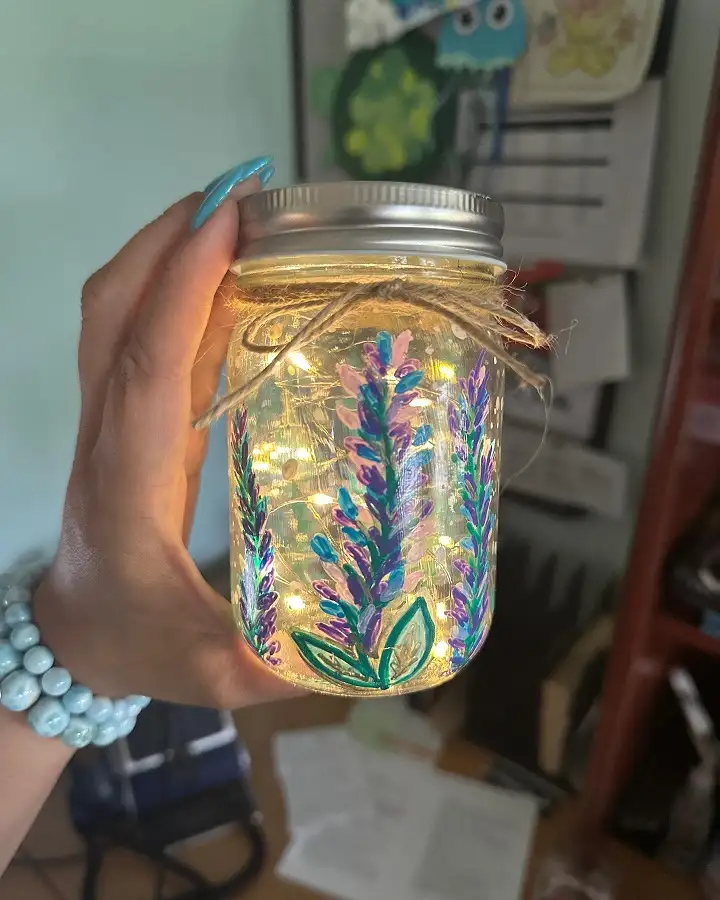
Lavender that never wilts. Sprigs in purple, blue, and pink climb the sides of a clear mason jar, with a few simple green leaves at the base.
Coiled inside, a string of tiny fairy lights glows through the glass, and twine tied in a bow finishes the neck.
Wash the jar with soap and dry it well so the paint sticks. Glass paint pens or acrylic enamel paint will grip the surface best.
Dot short dashes up each stem, mixing purple and blue with a little pink, so the flowers look full instead of flat.
Fairy lights that run on batteries stay cool, so the jar is safe on a nightstand. Wrap the twine around the neck a few times before tying the bow. Tiny touches like that make it look store bought.
15. Slotted Cardboard Sculpture with Polka Dots
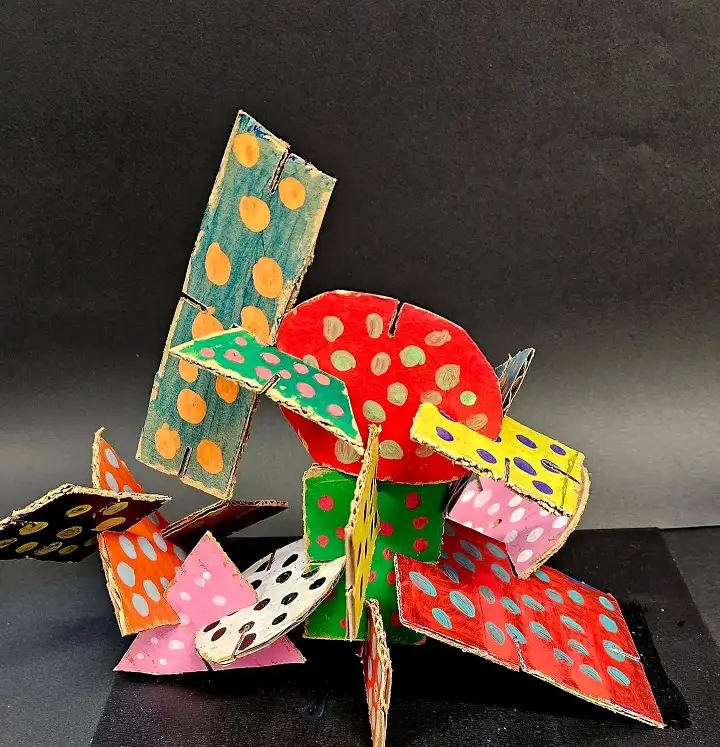
Sculpture sounds serious, but this one starts with an old shipping box. Flat cardboard shapes in teal, red, green, yellow, and pink each get a solid coat of paint and a layer of contrasting dots.
Small slits cut into the edges let the pieces lock together into a playful tower.
Trim a dozen or so rectangles, circles, and triangles from corrugated cardboard. Coat both sides in paint, then add dots with a pencil eraser dipped in a second color.
Make two short slits in each shape and slide pieces together where the slits meet.
Building outward and upward at the same time keeps the tower from tipping. Nobody can get this one wrong, so it suits anyone who feels stuck at drawing. Wobbly is part of the charm.